It is a Christmas time so why not talk about some of the nice gifts. Today I have special one to talk about, it is very nice pendant classics, a design icon that never gets old. The Norm 69 from Normann Copenhagen is a sculptural pendant light that consists of 69 parts. It can be assembled just by folding the elements and attaching these to the base cylinder.
It was a great Xmas present and we have spent a good portion of the evening to complete the lamp. The overall result is stunning! It has very specific look and shape, and for me it is hard to believe that this was designed back in 1969. If this Scandinavian design matches your taste or you are potentially considering purchase of Norm 69, I recommend reading the rest of this post to give you some purchase advice and assembly recommendations.
General observations
- Firstly, be prepared that some of your visitors might consider this lamp shade being purchased from IKEA, some might even persuade you they have seen it there recently 🙂
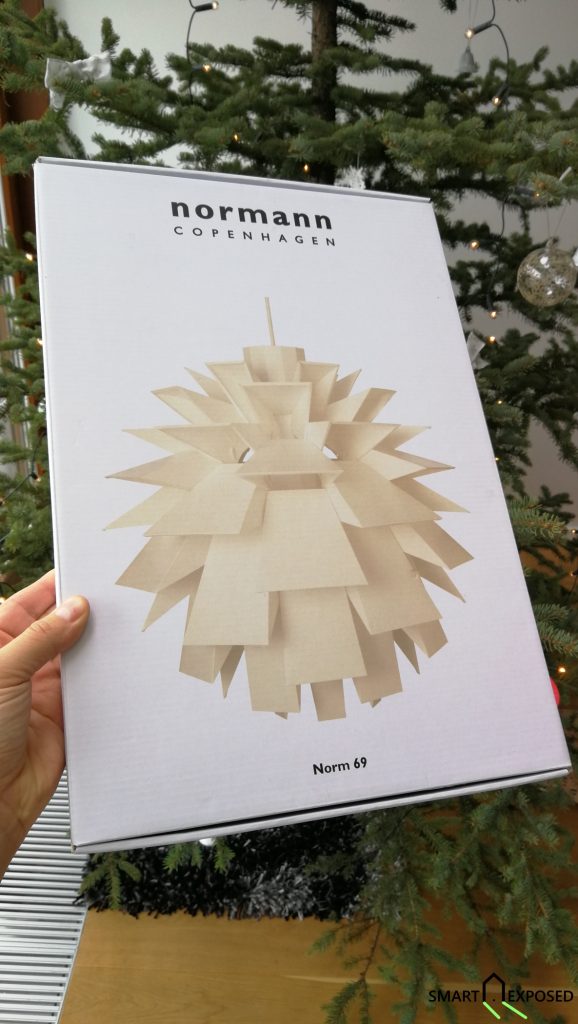
- The first look of the package will give you no hints that there is a lamp of such size in it, it’s almost like a joke.
- The magazine-size assembly instruction manual that comes with it is written in multiple languages, however the whole procedure for each is just a three-pager covering the entire process.
- There are multiple sizes of the Norm 69 lamp, we have got the X-Large size (60 cm diameter) but you can choose from more smaller and one bigger options as far as I am aware.
- It does not come with the cable, nor the bulb socket or canopy. This is sold as a separate item.
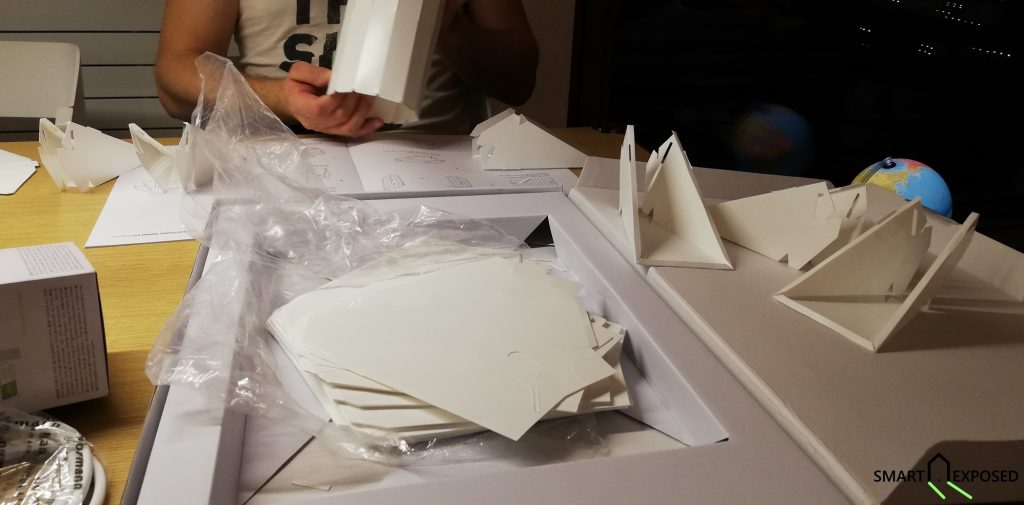
- From all the pictures I have seen before I got the impression that it is a solid plastic material the lamp is made from. The reality was a big surprise to me. It is a very thin plastic material, almost like a magazine cover.
- The trick how such a thin material can retain its fixed shape is in the sophisticated design of the individual parts and the entire lamp.
- From the package illustration one could think that the color of the lamp is not white, but rather marfil. But this is not true. The lamp is in bright white color.
- The lamp is not heavy. It could weight around 1kg which is not much for a lamp of such size.
Assembling recommendations
It took us a good part of the evening to complete the shade, so make sure to reserve enough time for that. I am not saying it is a bad thing, absolutely not. This Xmas gift was real fun to assemble. But it is 69 parts to put together, and you have to fold each shape separately, so please be prepared for that.
Norm 69 lamp – assembly 
Norm 69 lamp – assembly 
Norm 69 lamp – assembly 
Norm 69 lamp – assembly
- If this is your first Norm 69 assembly try, see the videos to get the overall understanding of the building process.
https://www.youtube.com/watch?v=7RjbjDXqSqk
https://www.youtube.com/watch?v=xOGR30140Ic
I have not done this step, which led to few glitches I had to solve. - Make sure the central cylinder has nice and round shape before attaching any side elements
- When assembling all the elements, please note that each one must be attached to the base cylinder or previous elements using all four connection points! It is very difficult to return to fix bad connection point spotted in lower layers.
- Also, as stated clearly in the manual, all elements should be assembled with the matt side outwards.
- All the 11 layers of the elements are being attached the similar way, however the last round is a bit more difficult as there is limited space to get your hands in to snap the elements properly together.
- Once you have completed all the 11 layers, there are two conical hanging elements to be put on the cable. Please, make sure these are again perfectly rounded, before attaching.
- And as usual, always follow the instructions in the manual 🙂

norm69-manual 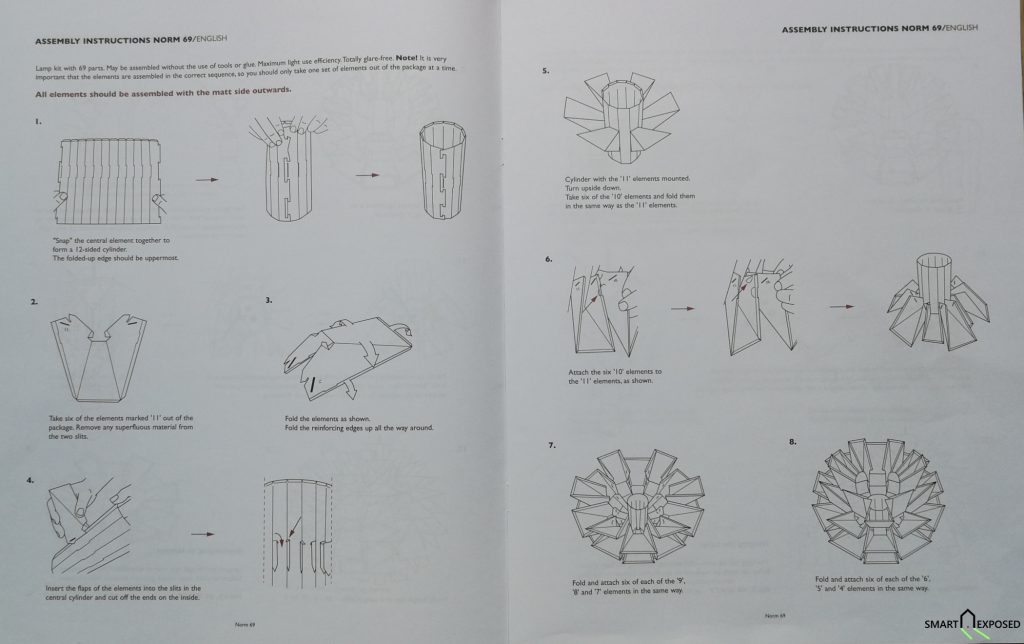
norm69-manual1 
norm69-manual2
Recommendations / Conclusions
- The manual could have been more specific about some connection details I already reported, calling out the critical steps. Now I would obviously know these and would have no issues assembling any further lamp shades, however I think it is good to admit that the instructions could have been better. (It is not IKEA ? )
- The material is prone to cracks. Please fold all items very carefully! I have been doing this with my wife together and unfortunately few cracks happened to both of us. This leads me to my biggest complaint which is the quality of the material. I am not sure if this was an isolated issue in our case, but when researching on the net now there are noticeable warnings that the plastic parts are more prone to cracking, especially when cold. One extra piece of each shape in the lamp package would probably solve that problem, if the material is not going to change. The cracks happen always on the edges where the pre-cut bend is located. This is the main low-point of the almost 170 EUR priced pendant lamp.
- The recommended bulb is 60 Watt maximum, considering the original fixture with E27 socket. Obviously the heat produced by the bulb is the limitation, so there are good alternatives to incandescent light bulbs to be considered here. I am going to try 14W LED equivalent with 1100 lumens from GE, which is dimmable LED equivalent of 75W standard bulb.

Update: “Wow, the lamp is gorgeous!”. Due to the flower like design, you’ll never find an angle to directly hit your eye by the beam and to really see the bulb you have to look from the very bottom through the smallest elements of the shade. That means, the light is spread around the room by the reflections of the individual elements (that’s why the glossy element side needs to be facing inwards when assembling it), and also through the transparency of the elements (that’s why the elements are made from such a thin plastic material).

Norm 69 lamp 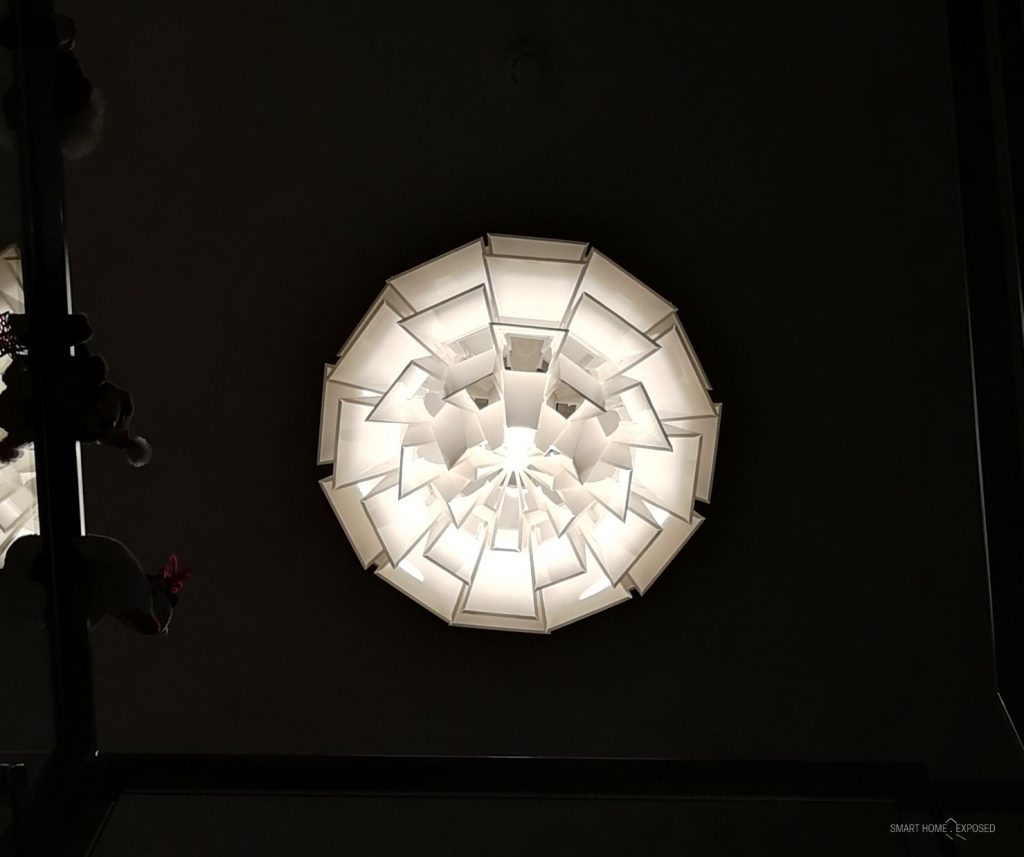
Norm 69 lamp from bottom 
Norm 69 lamp from bottom wide 
Norm 69 lamp final
As shown in the manual drawing, the bulb is located at the very bottom end of the central cylinder facing downwards. To allow the light nicely spread around the entire shade I would highly recommend to choose a bulb that allows to radiate at the widest angle. This is especially important when choosing LED bulb equivalents. The GE bulb I am using does quite good job in this case.
When it comes to the light intensity, the 1100 lumens are just enough for my hall size, I definitely would not want to go below that. The color temperature of the light could have been a bit more warmish, even though they claim it is 2700K. But this is just my personal preference for home use. But maybe this is just because the thin plastic is probably slightly filtering the light adding tiny tinge of greenish tint.
The bulb I have chosen is dimmable one, so my configuration in Loxone just softly glows up the lamp to 5% intensity when motion is detected (Mv input) and only with push-button press it slowly increases to full brightness. During the day, when there is enough light in the hall, motion obviously does not trigger anything. (DisMv input)


Did you purchase from the manufacturer or a dealer?
Can you “warm up” the plastic to prevent cracks?
It was purchased in a design store, so dealer was it. Warming up might be an idea, but the surfaces which are to remain flat must remain untwisted. So that might be challenging.
Could you see the cracks once assembled?
Hi Lynn, yes these are unfortunately visible, if you focus on details.
I figured, that i put in a bulb not light enough and would like to switch the bulb. Any thoughts, how to replace bulb for that thing without destroying it? I seem to have lost its manual and the manual in your blog doesn’t have any tips either.
Found a manual online, that says “Bulbs can easily be replaced via the flexible bottom of the lamp.”. I hardly disagree about flexible bottom, it rather feels like the the structure would collapse if i went bending the pieces in the bottom. Appreciate if you had any pro tips. The manual could be way more specific or the manufacturer could provide some how-to videos.
I think this depends on the size (diameter) of the bulb. I think it might be possible to exchange it from the bottom, but my personal advice is that you can do it also a bit differently. You can remove the whole plastic “sphere” by simply squashing a bit the two hanging elements that are placed inside the central cylinder. See figure 11 in the documentation. If you are gentle enough, you should be able to lift the sphere, and move the funnels up the wire. This will help you then to remove the whole sphere while leaving the light bulb hanging in the socket on the wire. I use that when I want to shower the dust off the sphere. This way you could have easy access to the bulb replacement as well. Just a thought.
Returning the sphere back is just a reversal of the process, putting the bulb inside the top of the central cylinder, moving the sphere up, and then pushing both of the “pyramid funnels” into its original position.
Thanks, that was helpful. Still a few pieces came off and i got them back in place not exactly properly, so now a few pieces of the structure look out of order. Also don’t feel like rebuilding it from scratch. So to anyone reading this: make sure you attach a proper and long lasting light bulb in first place as replacing it later will be a really tough challenge. The lamp does look fancy, but for the price it’s not really fun to assemble and disassemble. Unless of course you are a huge fan of building origamis or models.