Is has been roughly 5 year since I installed the Velux indoor electric blackout blinds on our three roof windows in the bedroom. Until today everything worked more or less fine (some minor things happened though), but for some reason one of the blinds stopped working this morning. The were some symptoms noticeable for some short period before today, which was that the blind stopped working whenever we opened the window, but I never had a time to investigate the problem.
After some initial inspection of the cabling i found out, that the 24V is coming normally into the Velux window frame, but not to the actual window. Also, I was almost sure that nothing will be wrong with the blind's drive itself, because of the symptoms mentioned above.
So I suspected that the cabling between the fixed window part and the moving roof window will be the root cause of the trouble. Quick look from the opened window to the right side where the cable bends with every window movement confirmed my theory about reason of this failure.
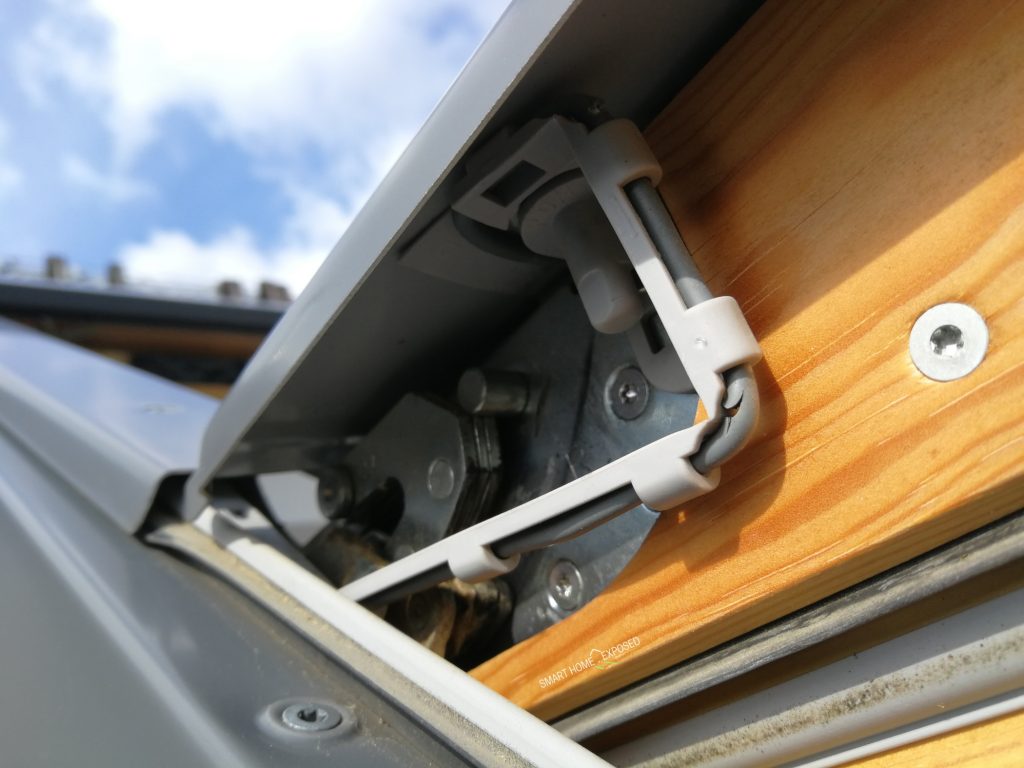
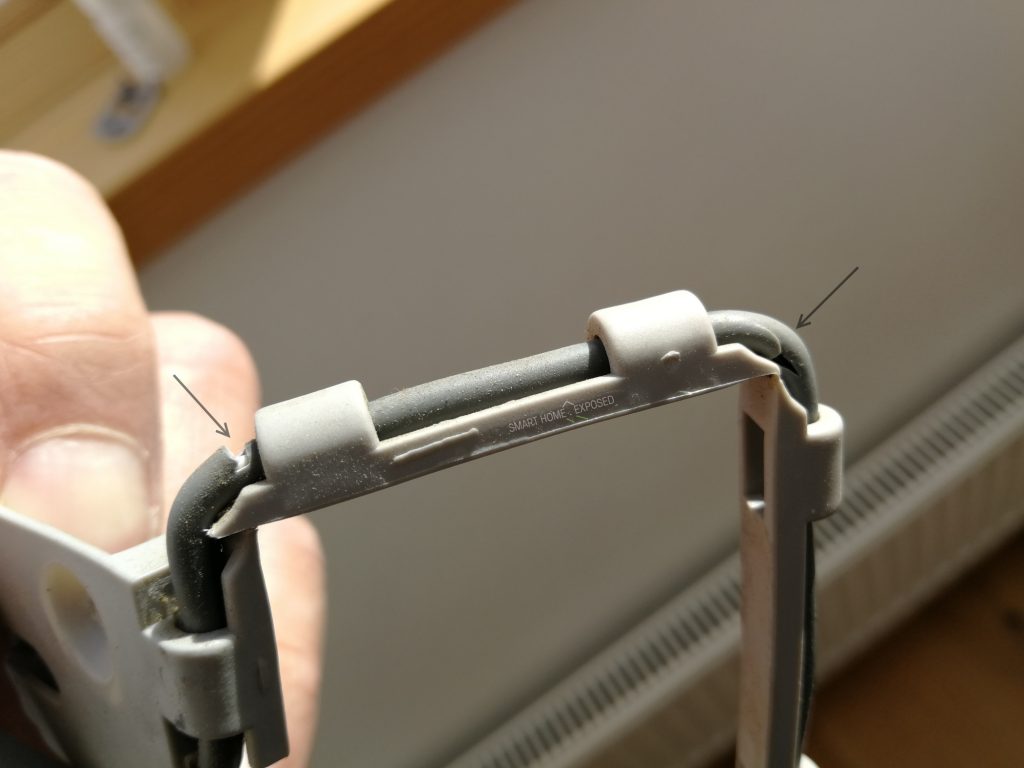
As you can see, the cable broke on two places. To fix this issue, I had to replace the cabling. This require complete removal of the blinds by:
- Unscrewing the left and right aluminium rails and the bottom wheels holding the strings
- Removing the rails
- Snapping out the blind unit on both sides
- Disconnecting the connector located on the right side
See this video for step by step instruction.
After that you need to remove both metal covers on the right hand side of the window. Each is fixed by one torx screw, which is also holding the plastic flexible support in the cable turn close to the window hinge. You do not need to fully remove those two parts, it is enough to lift these to be able to remove the plastic cable holder. Once you manage to remove the cable, replace it with a similar new one. The end connector can be either replaced or soldered back to the now cable.
The trickiest part is to properly place the cabling around the hinge. Take some pictures before removal, in case you have only one window. My room has three similar which gave me the guidance how to put the plastic piece back in position.
Then place back the blind unit, connecting the connector firs and clicking it in position. Next mount the rails back and finally the wheel with the strings to the bottom of the window. After that do some manual test before switching it on.
Now, I was replacing only one window, which is the one we open the most frequent. Quick inspection of the other two revealed the need for the rest to replace the cable as well. This is something on my plate for the future, but be aware that 5 years is close to the lifetime of the product, or at least its cable design that breaks at the hinge positions.
I hope this might help someone with the same problem.