If you already have DoorBird intercom installed (like I do) there is an interesting peripheral device you can pair it with to either become your primary source of doorbell sound, or to just enlarge the area where you want to be notified about the doorbell press. And that all over your existing network. There are some potential question marks but we will get there in the reading about my experience with it below.
The DoorBird IP Door Chime is an ideal addition to every DoorBird IP video door station. It’s very easy to install, no PC for configuration is needed. The whole setup process and control can be made using your smartphone or tablet (iOS and Android).
It is designed to work in various network environments, starting with WiFi connection, usual wired LAN, or powered over LAN/POE.
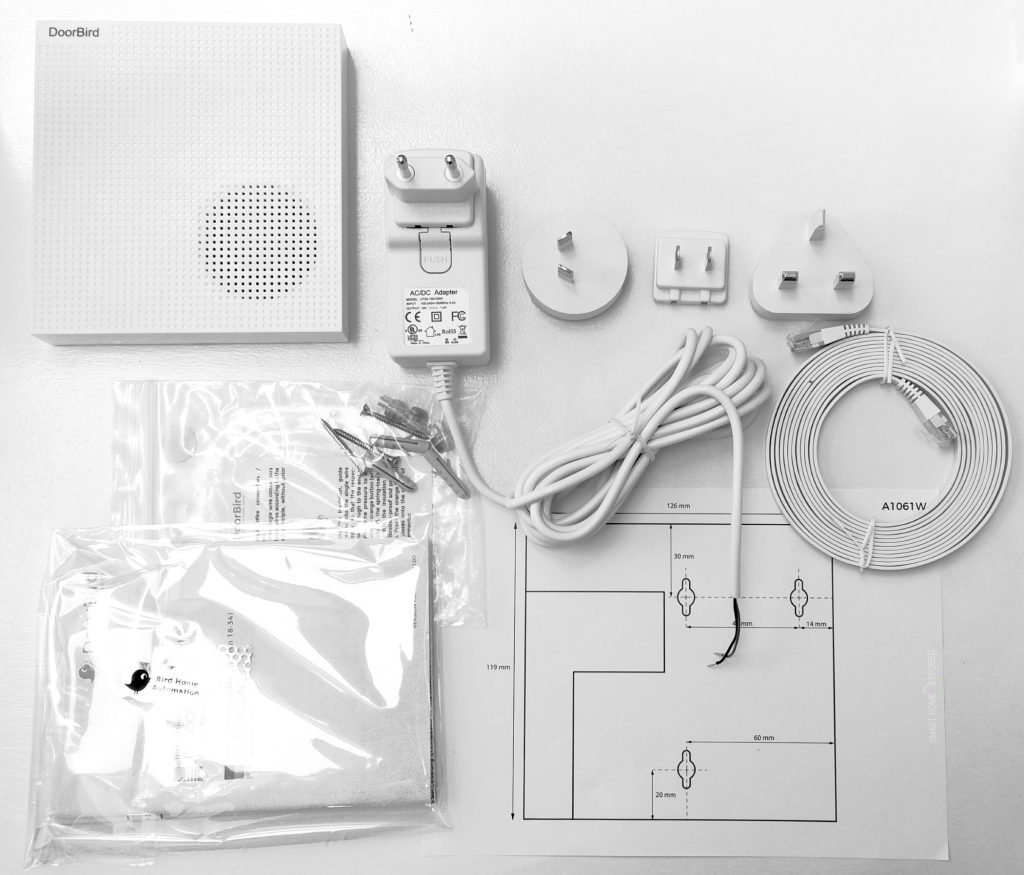
What is in the box?
Similar to the DoorBird Intercom, also here the package contains everything needed for installation of all kinds. Apart from the device itself you get an external power supply (15V, 1A) with four exchangeable plugs (100 – 240V) for various markets. Also, there is flat white CAT6 Ethernet cable for LAN connection, three suitable dowels with screws for wall mounting the chime, drilling template, few wiring terminals, and then user manual including passport with credentials for configuring the device.
Installation
The installation procedure is very simple. All you need to decide is how the Door Chime will be connected to your network and whether you have some additional conventional doorbell push button you would like to use as well.
To better understand the connectivity options, let’s see the terminals from the back side of the Chime.
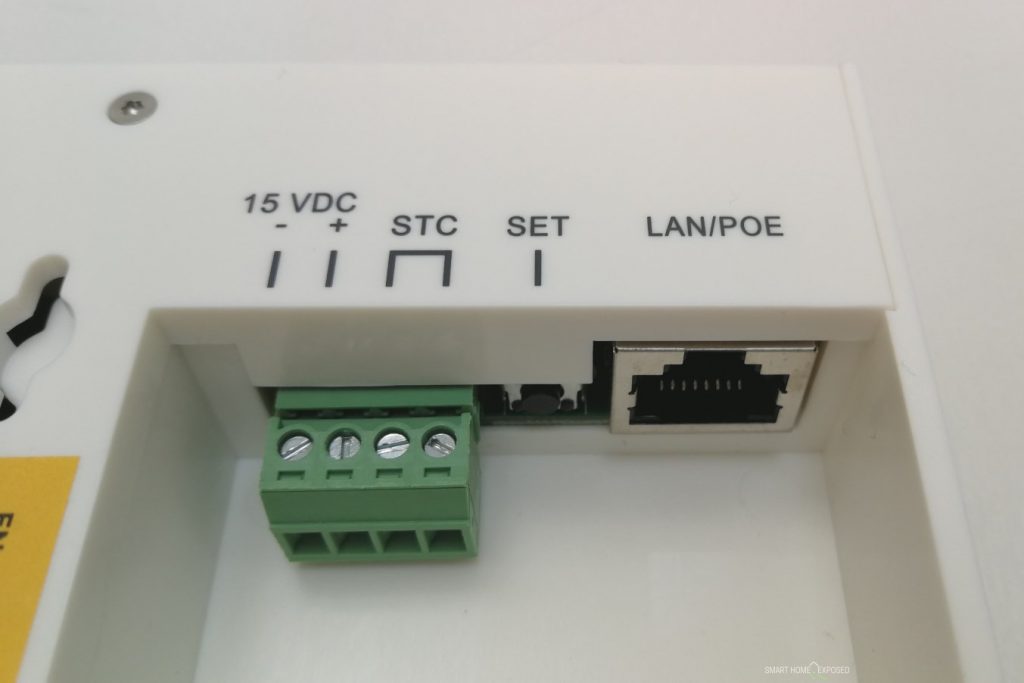
From the left hand side:
- First two screws are the DC 15V input from the power supply. You won’t need this connected in case you want to power it vie POE port on your switch or injector.
- Two other screws labeled with STC are terminals for external push button. They call this “storey-call” button terminal. Basically you can have two different ring signals, one assigned to your DoorBird intercom and other from your push-button somewhere. So, if you for instance have the intercom located by your entrance gate, you can also use a push button next to your door and have different ring types set for each. Wiring is simple, just a closing the contact triggers the sound, no external power for that circuit is necessary.
- Then there is a SET micro button to initiate the WiFi setup procedure.
- Finally, RJ-45 port for you Local Area Network, supporting also Power over Ethernet IEEE 802.3af mode A. You need to have DHCP enabled in your LAN in order to get the Chime work on LAN or WiFi. If you decide to choose wireless, please note this supports only 2.4 GHz, 802.11 b/g/n. Antenna is integrated in the device.
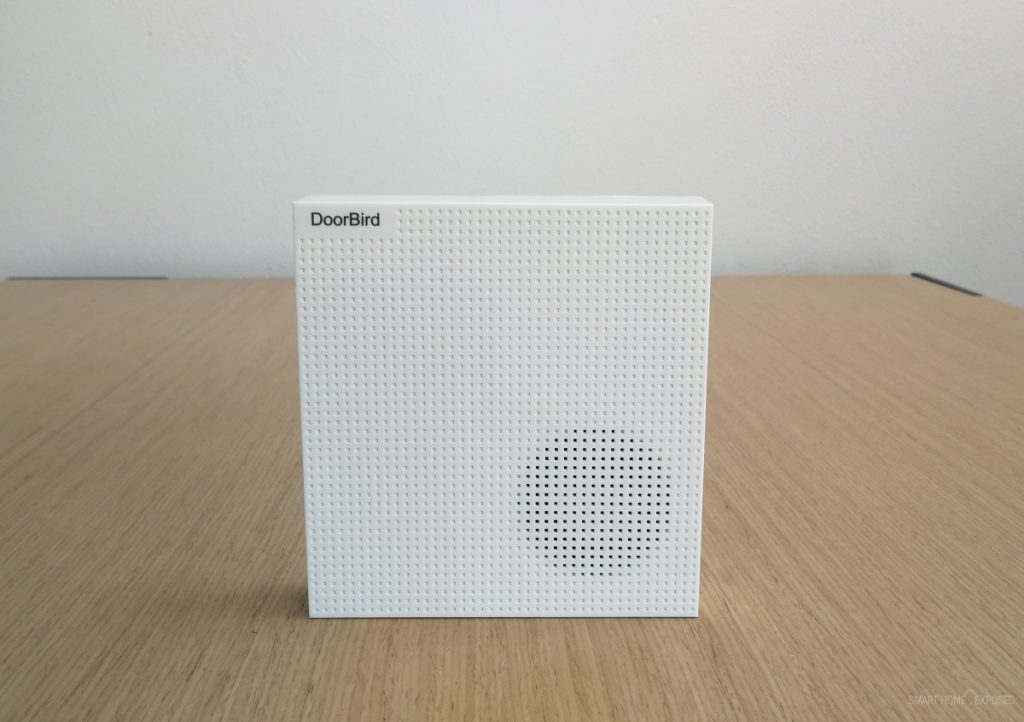
There is not much other things to describe really. Apart from the terminals on the back side, there is blue status LED on the bottom edge and a 102 dB loudspeaker on the front. The LED can be configured to flash while ringing. All the configuration is done via the smartphone app.
To complete the setup is trivial, and the procedure itself is well captured in the original footage. So lets have a look at some details.
Details of the settings
As you can notice in the video, you need to first register the device using your/some email address. That address is then used if you want reset your password. These credentials then allow you to access the settings.

There you can turn on or off the status LED on ring, set the chime volume and choose your favorite sound for default ring (from paired Intercom) and other for the wired push button (storey call). There are around 53 different sounds to choose from and you can also set the number of repetitions (1 – 10) to be played.
Obviously, this IP Door Chime is an internet thing. The first power-on sequence takes about minute or two, and then you hear confirmation gong and audible notification that “the device is successfully connected to internet”. In case the connection is not possible or not working, it says “no network” and the blue LED stays on indicating there is something not right.
I haven’t tested all corner scenarios, but some of you might think, why the hell a doorbell needs an internet connection. So, if you intentionally block the communication (on a router) after successful setup, it will still work and properly announce not only the wired push button press but also all LAN calls from DoorBird Intercom. This is just to prove, that the actual communication between Intercom and Chime is happening on the local network and not being routed through some cloud. However, if you enable and monitor the traffic, there are some tiny interactions between the Chime and Internet. I haven’t investigated what exactly these are.
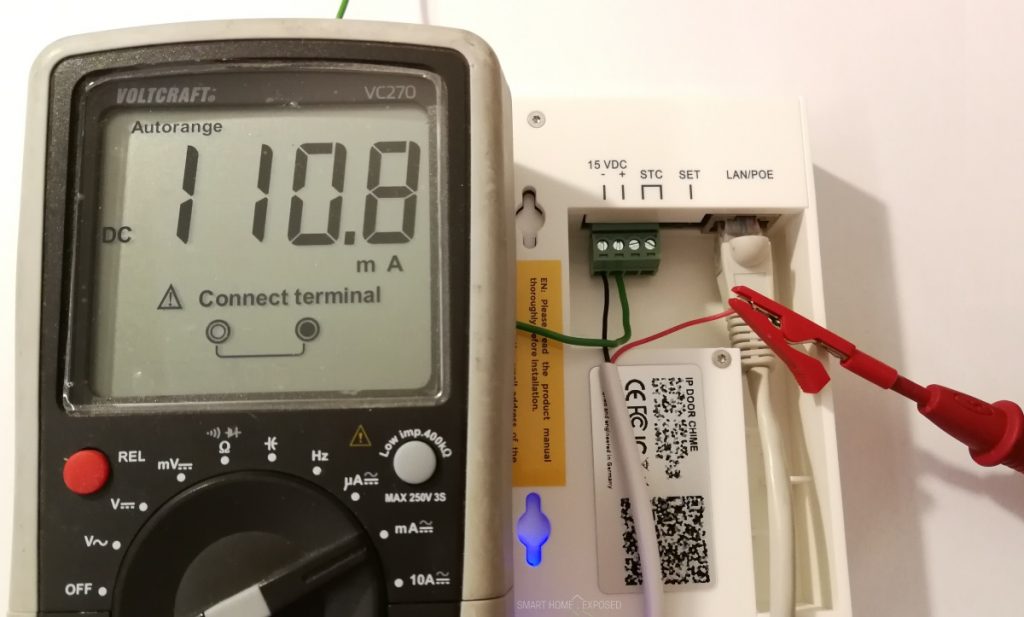
When we look at the device energy consumption, it draws around 111 mA at 15 V from the original PSU. That’s around 1.7 Watts consumed in idle (27/7) + some additional inefficiencies in the PSU itself. If you already have a network switch with some PoE ports available, it is probably vise to use that method of powering the Chime, which reduces a bit the necessary cabling and also removes the need for additional power supply running at all times. My switch was showing 1W being delivered using PoE to the Chime, but I have no extra meaning about the accuracy. That solution is of course not possible when considering WiFi as the connection method.
What is this IP Chime for?
Now who is the right customer, or what is the typical use scenario for this DoorBird IP Door Chime? I understand the device being a part of a DoorBird product portfolio as a nice addition to their IP Intercoms solving the problem of having doorbell chime responding to the call and also wired push buttons where needed. The installation is easy, and it relies on your LAN infrastructure mostly or fully. It offers wide range of connection possibilities and plethora of nice sounds to be selected.
In my smarthome with Loxone I still use the “old fashioned” electromagnetic gong, which produces nice and natural sound and needs to be energized only few seconds when ringing. I had to do some modification though, as the standard gongs are usually designed for 8V, or the mains. On the other hand, it does not allow me to adjust the volume, nor change the tone. And it is not over LAN. I need to trigger the gong using one of my relay outputs in the system and need a dedicated cable for it.
Where I see the space for the IP Chime is to act as an addition to the existing gong, or for renovations where you can nicely fit the full video intercom experience together with classic sounding Chime. Or, if you have a garage or garden house where you hardly hear the bell, this product might be the right for you in combination with your DoorBird Intercom.
What would be nice…
The fact that all communication with the Chime is over the network opens interesting ideas. There might be also other scenarios you might think of in a smarthome environment. It could easily serve as an audible notification device, with stored messages or sounds that could be played via http commands. Some API allowing that functionality would make the product much more versatile and surely more popular. For example something like:
http://chime_ip/play=tone_name&volume=50&repeat=0could call the device with parameters like the tone name, volume and repeat and it would simply play the selected sound. Those triggers would be easy to create in any smarthome environment, I believe. Having the option to upload and play your own audio files this way would be fantastic. There could be specific recordings for burglar alarm, water leek alert, smoke alarm, and so on.
I have contacted DoorBird with that ask and they responded that “currently it is not possible to interact with our peripheral devices like the door chime with our API. However, this feature is on our road map and will be implemented eventually after the A1101 indoor station and the D111 doorstation have been released.” If that happens, this Chime would become super interesting device.
Other than smarthome, for conventional use it would probably help to allow the user to set different chime volumes for the time of the day. Families with small toddlers would surely appreciate that feature. 🙂
And that’s it. If you have any comments, questions or suggestions about usage or what else to try, leave me your comment below. Many thanks.
The API would make this product very interesting!!!
Can I use the Doorbird Chime with the Loxone NFC Code Touch?
I don’t think so, at least not before they publish an API for the Chime. So far it works the way that it has to register to the DoorBird Intercom in the mobile app.
Hi, thank you for the great review. I have a D2102 and I’m trying to connect a standard chime to it. In the manual it seems to suggest this can be done using the “2 pin Jack” on the “soft touch call button” but the diagrams/explanations are very ambiguous. Did you just connect your bell to rel1 or rel2 or did you find another way?
For the bell function I am using the connector with the short red cable attached to the back side of the button. There are two terminals (Switch and Bell). Yellow 4 wire cable goes to the unit, and the red 2 wire goes nowhere. This is where you get the button press detected. If you have conventional bell (low voltage 1-24 V, low amps 1 A max) I am sure this will work as described on page 17 in the manual (bell triggered through this potential free contact). This is not for higher voltage chimes! I am using this contact for Loxone digital input to register the button press. No need to use any of the relays integrated REL1, REL2 (even though I have wired the intercom from these terminals as well).
@Kops like Rich Frome, I am trying to connect a standard chime to the D2101.
The manual on page 17 show a little diagram of 4 pin or 2 pin and page 19 describes the 2 Pin (BELL) relay, but it is not clear where to connect the two wires onto the actual Doorbird device. The yellow 4 wire cable attaches to the unit with White, Red, Black, White wires (from left to right) when looking at the back of the unit. Which contacts on the doorbird unit should we be connecting the incoming and outgoing lines that go to the chime and its transformer respectively? The sketch on pg 17 is not as helpful as it could be.
Hi Dwayne,
I am using the two red wires which are right behind the push button. See this image Clicking on the image will zoom. There is a connector with a label BELL.
Please note, it is designed for low voltage and low amp devices only.
I hope this helps.
No news?
Hello. i have the D2101 FV with ekey. Is it possible to turn off ding dong sound at the chime when I unlock the door for someone in the app? It is enough to have ding dong when someone at the door presses the doorbell. I do not need to hear ding dong again every time I unlock the door for someone in the app :-). And is it possible to get a sound at the door when i unlock ? Visitors dont hear when im unlock the door for them 🙂
Does it also work in combination with the Unifi G4 Doorbell Pro if it is only connected to a LAN/POE? Is it then possible to pair the Doorbird chime with the G4 Doorbell Pro?
I have absolutely no idea. I would guess it is proprietary, or at least I haven’t seen API that other product could use to integrate this DoorBird Chime.