Loxone offers their own out of box solution for multiroom audio which consists of Loxone Music server, multi-channel Amp and various types of wired speakers. The topology requires audio cabling prepared between the centrally located (potentially rack mounted) amplifier and all the places where you would like to listen to your music. It is the opposite approach to what most other multiroom audio streamers do, having centrally located storage with database and LAN wired endpoints. There are obviously pros and cons for each of the setup.
I kind of tend to the LAN solution, not only because of the price (Loxone’s Music server ~1600 EUR, twelve channel Amp ~800EUR) and universality, but also technically I did no preparation for long audio cabling between multiple rooms. Moreover, I feel it is not the right Hi-Fi approach and connection to other peripherals (like turntable) would be super challenging.

Background for this decision
Historically Loxone multiroom audio solution was based on Casatunes media server, and later on switched to Squeezebox with Logitech Media Server (LMS). However, they customized the music server back-end to better integrate with the Loxone UI, so simple LMS installation is not a direct replacement of their boxed Music server. There are ways how to make it closer substitute, requiring LoxBerry the plugin-platform for Raspberry Pi. I will probably get there one day as well, or it can also happen that my roadmap will divert to a different multiroom audio platform.
Before I made my decision to try Logitech Media server as the multiroom audio streaming option, I had the following options on my list:
- Loxone Music server solution – I left this idea mainly due to the extra audio wiring needed all around the house, the topology in general and price.
- Sonos - Was a hot candidate for a while, mainly after they launched their Connect and new Amp. Flip-side is the wireless only transport, closed system and price.
- Squeeze box with LMS (Logitech Media Server) – Currently tested solution, and the one this post will be mostly about.
- Roon – Top notch streaming platform, I am still considering it for the future, see below why not now.
Roon
This multiroom audio platform looks very promising and I have discovered its existence pretty late. It looks very robust, with the focus on ultimate audio quality providing rich metadata to enrich the audiophile’s experience. I fully recommend reading more details about the system to build up your own opinion. Just briefly, is has pretty similar architecture to the LMS. There is a dedicated server called “core” that manages your music collection from multiple sources, building an interconnected digital library. It can also store the actual digital audio files or you can store these on your NAS. The “core” can be purchased as an out of box device called “Nucleus“, or it can be hosted on a device based on Intel NUC line as “ROCK“, which is a do-it-yourself build of Roon OS, a custom Linux based operating system for running Roon Server. Before you ask, even if you build your own core server and install the ROCK build, Roon is not free. It is a service that costs you $119/year, or $499/lifetime. If this was the brain-closing sentence for you, please watch few videos and check the potential of the system to see what all is behind.
For me Roon represents multi-room audio platform of the future, how distant this future will be is yet unknown and depends on things I will list later below. But there is a strong reason why am writing here about it:
- Roon seems to go beyond everything I have seen so far, it reinvents the tangible factor that has vanished after the decline of vinyl record covers and CD booklets
- It emphasizes the sound quality and optimizes the data stream for each of the endpoint, depending on his capabilities.
- It logically splits the roles between control, core and output
- It supports multiple platforms and transport protocols
- Every investment I made so far into the multiroom audio HW can be reused with Roon later
Let’s elaborate more on the last point. The endpoints (the devices that actually play the music stream) that are based on Raspberry PIs with attached sound cards from HiFiBerry are fully supported by Roon, so even though I am describing here how to integrate the multiroom audio with LMS and I am currently using it this way, any future transition to Roon should not be that dramatic in terms of the HW changes. And BTW, there are much better and nicer endpoints/streamers supporting Roon, like my dream Naim Uniti Atom or Mytek’s Brooklyn Bridge & AMP, but the price tag 3000 EUR (resp. 5200 EUR for Mytek) explains a lot! So I’ll rather keep dreamin’.
Mytek’s Brooklyn Bridge & AMP
Let’s leave the idea of Roon for now and have the focus on the Logitech Media Server and the reasons for this being a part of my current setup.
The main reason for me to not go with Roon since the very beginning were mainly these:
- I do not have spare HW to install the Roon OS on but I do have Synology NAS running which can host LMS. To be fair here, Roon OS can be also hosted on NAS, but the specs have to be much higher than mine (and Intel CPU is a must). I would need to either buy a new NAS (to have the Roon OS installed there), build dedicated computer for Roon OS, or purchase Roon Nucleus (preferred option but expensive). The second and third option means additional HW in operation 24/7 just for the sake of potential music consumption (just a side note).
- I wanted to test something that is licence free. Not because I don’t want to pay for good things, but as a family member with small kids I simply cannot dedicate all my free time to play with these things. The 14 days trial for Roon is simply not enough. And there is not that much yet written about Loxone and Roon integration, so this would require more time to explore the things.
- LMS is well documented, there are great examples how to integrate things with smarthome systems, there is a separate project that involves LoxBerry to enhance the cooperation and data exchange between Loxone and LMS
- Apart from the endpoints (HiFiBerry) which I would need in any case, there was no major investment into HW/SW needed to try it out and demonstrate as a workable solution to the whole family.
Logitech Media Server
For Loxone and LMS there is already nice integration built based on LoxBerry, which is an open plugin-platform for Raspberry Pi. LoxBerry can be used for multiple purposes, supporting Loxone’s Miniserver to communicate with plethora of services. More details about all the available plugins can be found on the wiki page.
Now, I am not a LoxBerry user, I have not found the real need for it so far. I understand that for people that do have LoxBerry for different purpose (weather, backup, …) already, the multiroom audio using this LoxBerry plugin to LMS makes the most sense. There is nothing even close to the integration level it has already with Loxone, apart from the Loxone’s Music Server obviously. And the fact that there is a famous community project LoxBerry with a heavily used plugin for LSM support just confirms that multimedia support is one of the weak spots of current Loxone system. So sad! 🙁
If you’re interested to learn more about the LMS 4 LoxBerry, I recommend visiting the plugin page for more details. This post will continue to focus on the integration without LoxBerry.
Simplest setup
The following lines will describe my own configuration. There are for sure other ways how to achieve the same or even better results, and I will be more happy if you’ll contribute/advice in the forum.

Hardware
Hardware needed:
- Storage for your music files (NAS), you most probably have that already
- Device to run the server service (which takes care about file indexing, streaming to the individual endpoints, and control)
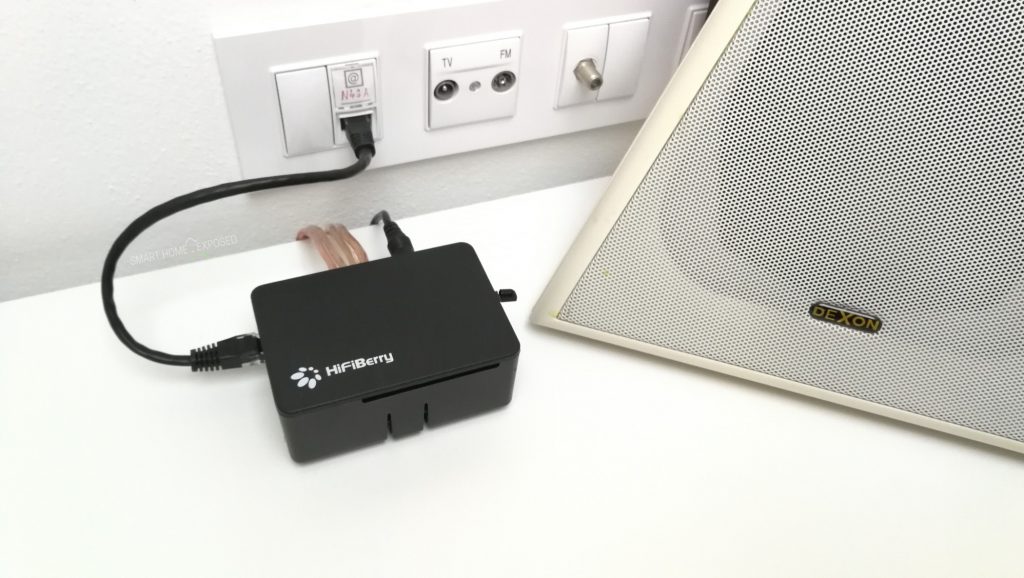
- Endpoints, the individual devices where the stream is converted into a real music. This can be various types of devices. I am using Raspbery Pi with HiFiBerry sound card for this purpose. Usually you’ll need Raspberry Pi mainboard, SD card to boot the system from, sound card with the output of your choice (digital optical, digital coaxial, line out or amplified output), box to put everything in (check the compatibility with the cards you want to put in), power supply and few cables.
- Tablet, phone or computer to run the control app to be able to organize playlists, and select music to play for each zone.
- And obviously a pair of speakers, or an external amplifier with speakers (and based on that properly chosen card with proper audio output)
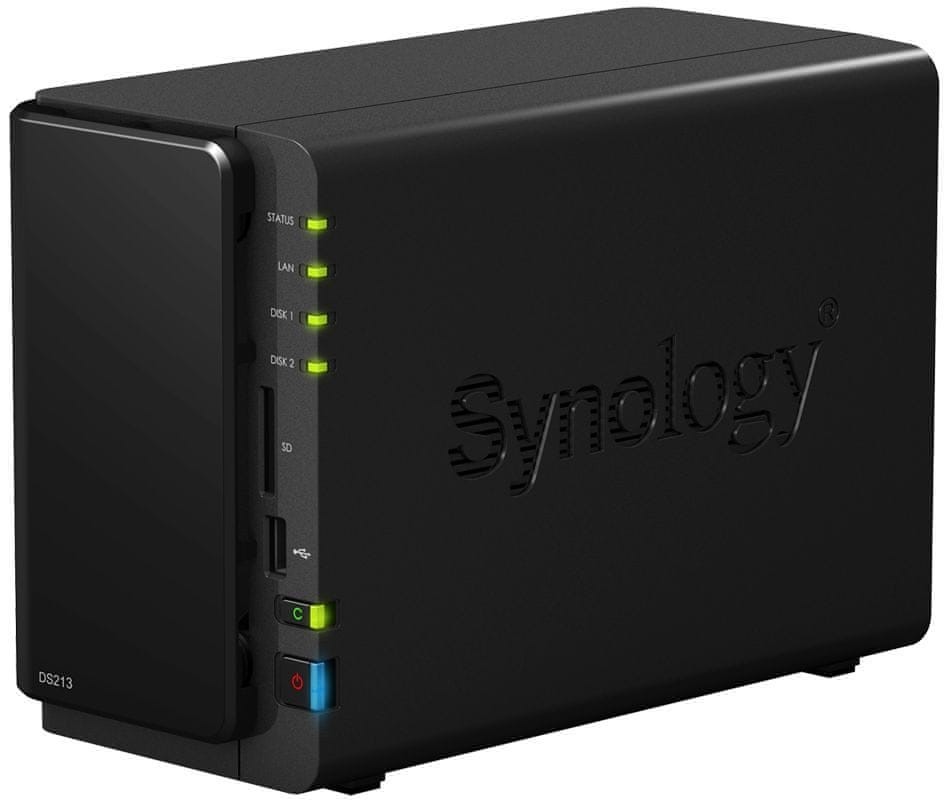
For couple of years already I have my Synology NAS DS 213 where I installed the Logitech Media server from the standard package. It is pretty straight forward procedure. Also, all my music is stored there. So in my case I do have the storage and the server app running on one device, the NAS.
The configuration is done through the web interface, then it just scans all the content stored in the defined folders and that’s it. If you don’t have NAS that could host the LMS, you’ll need a Raspberry Pi or other computer to host it and then it is probably wise to think again about the LoxBerry solution.
With the endpoints it is a bit trickier. I have decided to use Raspberry Pi 3B+ with HiFiBerry sound cards. For the kids rooms I purchased two Amp2 bundles. That bundle comes with Max2Play SD card image, which I retrospectively evaluate as a positive step.
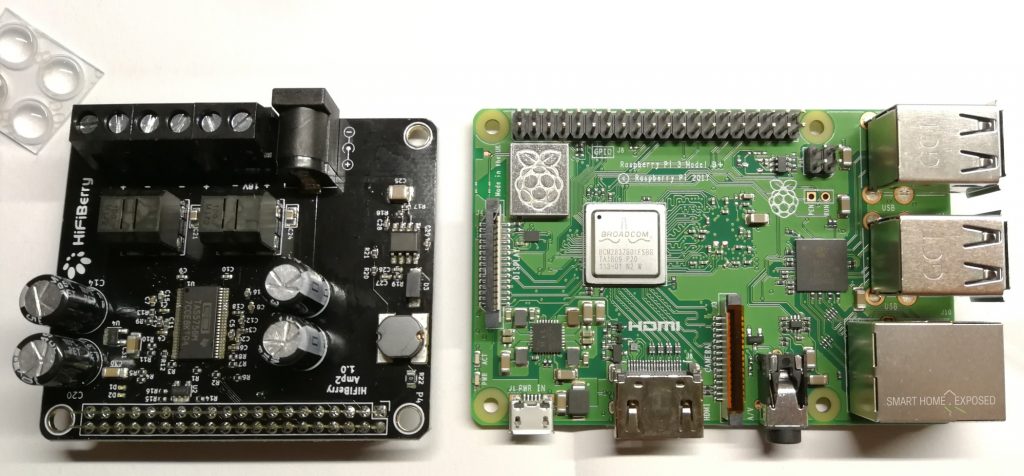
HiFiBerry offers wide range of sound cards, from the analog line-out options, optical/tosslink, to the versions with built-in stereo amplifier.
Software
The server side it is more or less clear, I believe. There are plenty of options what to install on the endpoints. I am using the following:
Max2Play
These guys made enormous effort to create image for Raspberry that is sooo simple to use, can be controlled and managed from a web browser remotely and supports wide range of sound cards and additional HW (like remote control). Initially I was a bit mad at myself, that I did not spend more time to research about Raspberry images that are free, but Max2Play deserves the glory here. It is feature rich (can be used as a standalone player, player with touchscreen display, or Squeezebox client) and works really great, I do not regret that purchase! So the following configuration I am going to describe refers to this Max2Play SW image.
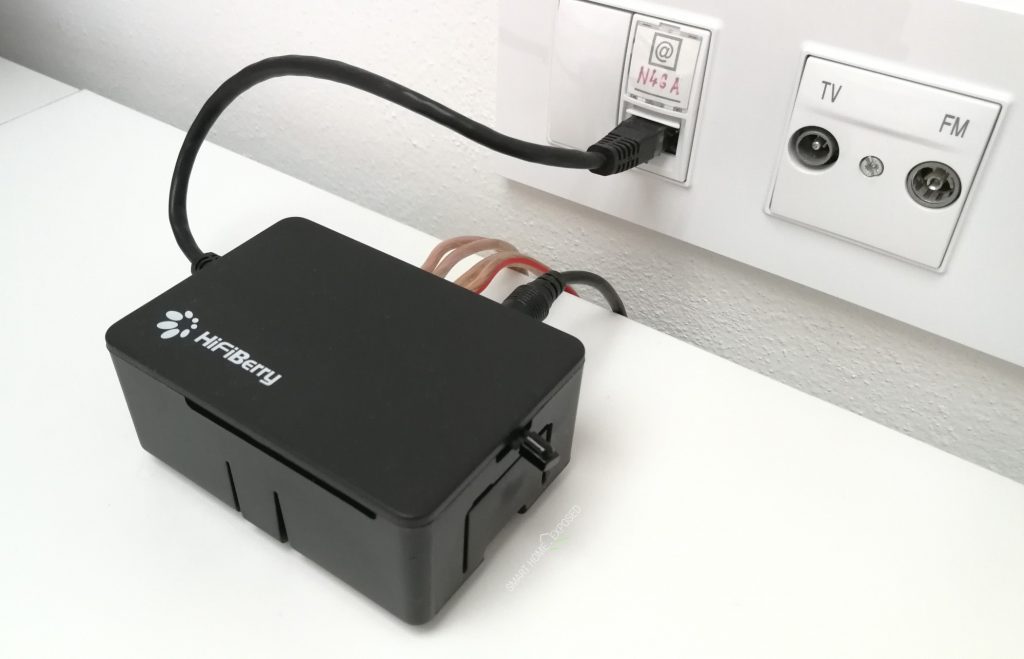
The installation of Max2Play on Raspberry is simple, you’ll get SD card pre-installed already, boot, insert licence number, and set everything in the web menu. It is so awesome that you even don’t need a monitor for the PI, all can be configured remotely. Just connect the power supply, LAN cable, screw the speaker terminals, insert SD card and voila. Power On!
After configuring the basic stuff (network details, soundcard output) through the browser the device is ready to play music. Logitech Media Server automatically recognises and finds these players in order to play music there. You can name these zones, play different streams in each zone all to group some to play in sync.
You can control the playback using your phone or tablet or desktop (web UI). There are several apps to control the streaming, I am using “Squeezer” for Android or “iPeng” for iOS.
Control your music zones from Loxone
There is well described command line interface (CLI) that can be used for integration with any other systems. There are commands to the basic functionality like Play/Pause, Volume Up or Down, playing certain playlists or interprets and songs. This all can be triggered through the Loxone UI, just by adding a commands for each of the button in the config. What is not that easy is returning information back from LMS to Loxone, for instance to visualize the song that is being played. (The problem is more general, to visualize any text from other sources, for details refer here). This can be achieved using the LoxBerry plugin mentioned above, which simulates the Loxone Music server and supports the feature rich UI interface to control the players. Without this you need to live with simpler interface with just buttons dedicated to each commands or radio buttons to select radio stations or genres to play. Yes, it is not integration in the right sense, but you can at least control when what and where is played. It does not substitute the app needed for album/interpret/song selection.
Here are the basics how to set it up with Loxone
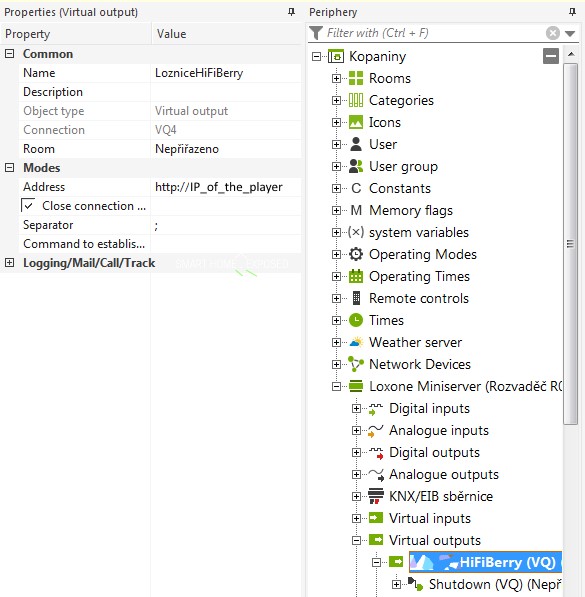
In the Loxone config you’ll need to create for every player one set of Virtual Outputs for controlling the player (with the address and port of the LMS and a MAC address of the Player as a command to establish connection) – this will be used for all the playback commands. And in case you’ll want to execute some commands from Max2Play on the players directly, then also a second set to execute these (with the address of the individual player). Please note that if you’re using DHCP address assignment in your home network, it is wise to reserve fixed address for each player so that it does not change from time to time in order to use that IP address in the commands.
To create the first group of Virtual Outputs for the player/zone, you’ll have to add Virtual Input into the config, with the name of your player, address of your LMS server and the MAC address of the player (which is used as a parameter for each command to let the LMS know to which player it should pass the request to – each command is preceded by identification of the player by its MAC address.) The format is following:
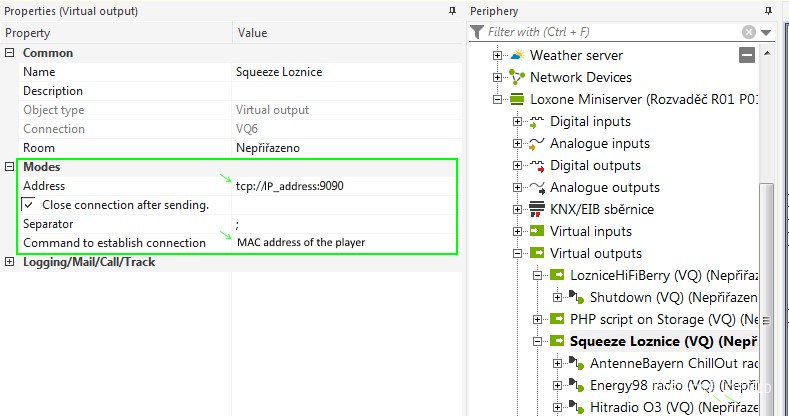
Address: tcp://<IP_address_of_the LMS>:9090
Command to establish connection: <MAC_address_of_the_player>
Close connection after sending: Checked
At the end of the MAC address add a blank space, so that the concatenated commands are separated by this spacer.
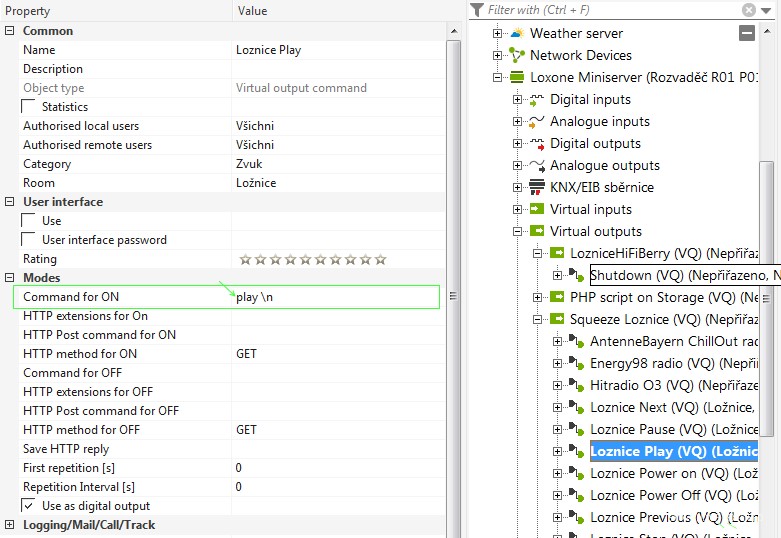
Every command has to end with \n. The list of basic commands are:
play \n
pause \n
pause 0 \n
pause 1 \n
stop \n

mixer volume <v> \n (absolute volume 0-100)
mixer volume <-v>\n or <+v>\n (relative volume +/-v)

power 0 \n (player off / on)
playlist index +1 \n (Skip/next song)
playlist index -1 \n (Previous song)
playlist shuffle 1 \n (Shuffle playback 0 off, 1 song, 2 album)
playlist play <URL> \n (play internet radio stream)
playlist loadalbum <genre> <artist> <album> \n (playlist loadalbum * Morcheeba * )

sync <playerid>\n or -\n (Sync the current player with the other or unsync)
There is a document with more detailed commands that can be used. In Loxone config the easiest setup for most common controls containing “Play/Pause”, “Previous”, “Next”, “Volume Up”, “Volume Down”, “Power On” and “Power Off” using the virtual inputs can look like this:
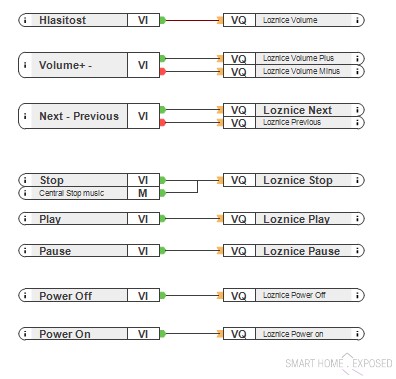
Once you create these VIs, you can use various triggers for these. You can have your favorite playlist or radio station played when you return home, use specific track as a wake-up song every morning, or have your favorite playlist played while the light is on in a shower.
Again as I said, this basic control functions does not replace the need to have one of the Squeezebox app installed somewhere. You cannot browse through the list of internet radios to look for the best channel. But it gives you the opportunity to use these functions as a quick actions, and once you’ll have your favorites set, call these with just a single button in the visualization or on the wall.
Once you have the virtual outputs created, you can use the Radio-button block to have a quick selection of the music to play from the Loxone app.
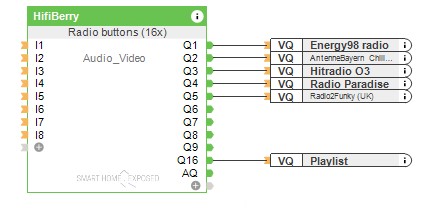
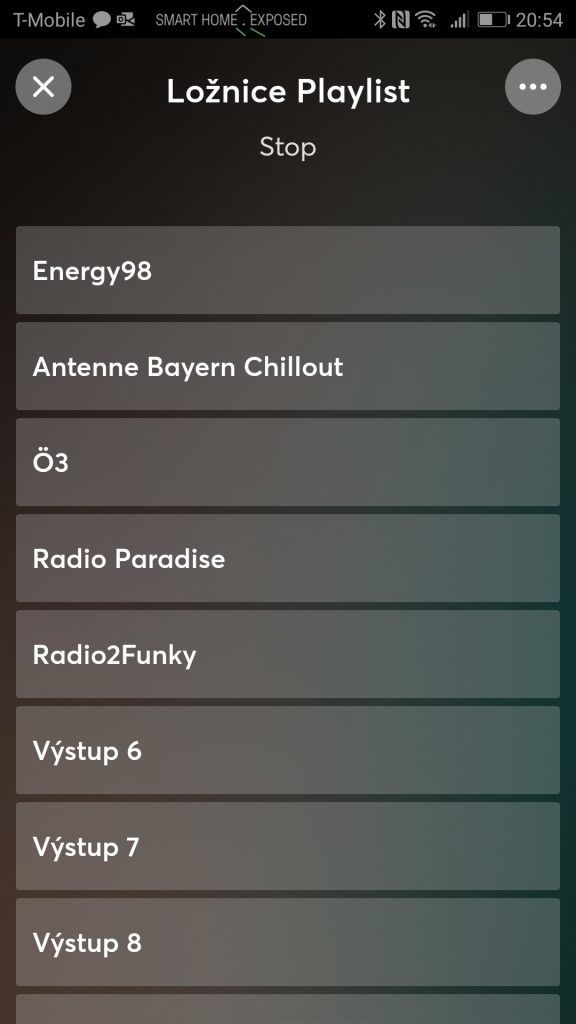
And this is how it could look like, just as an unfinished example. The Radio-button allows to directly select your favorite interpret, radio, or a playlist to be played.
Obviously the heading and button names can be changed to your needs.
And of course you’re not limited only to that. You can use your HW buttons or other inputs you currently use with Loxone, so the possibilities how to control the playback are not limited to the GUI only.
For calling the individual Max2Play player commands, there needs to the second set of Virtual Inputs, this time with http commands addressed to the individual players.
This way I have implemented automated stop and shutdown of the endpoints whenever I arm the alarm function. There is a sequence of commands Stop, Shutdown and then delayed switch-off for the sockets to cut-off the power when the house is empty. The output command for shutdown is:
/plugins/max2play_settings/controller/Basic.php?action=shutdown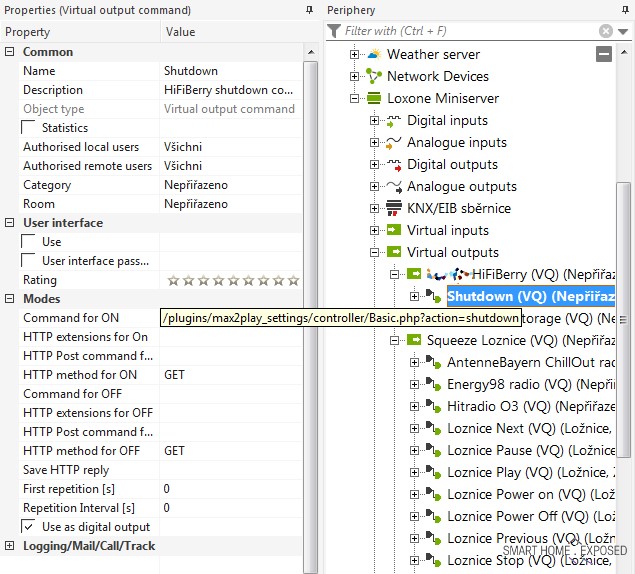
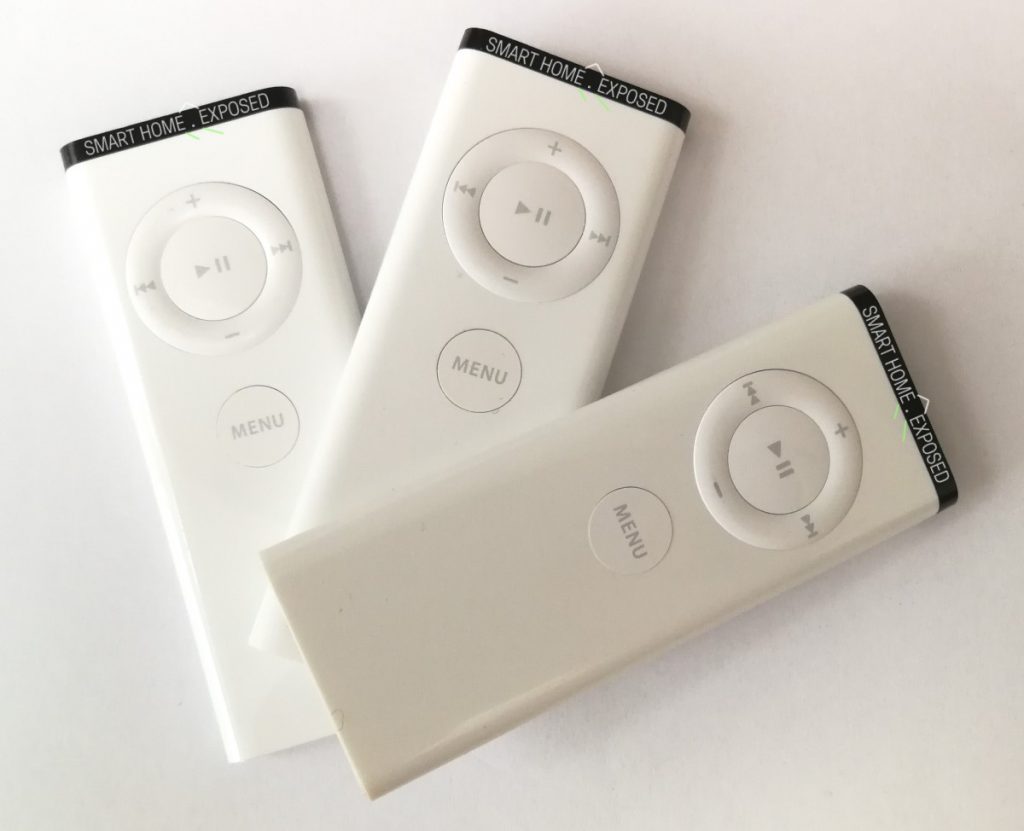
Infrared remote
There are situations where it is not very convenient to use the phone or tablet to control the music. Sometimes you just need to quickly change the volume, pause the playback or skip a song on a playlist, and this can be done much easier using a IR remote.
Read my next post about how to add Infrared remote functionality. It deserves separate post.
It’s just beginning and it works 🙂
Using LMS installed on my existing NAS device, and few players built on Rasberry Pi with attached HiFiBerry sound card and Max2Play image I got easy network streamers and first multi-room streaming experience.
This is just the beginning. I am planning to enhance the functionality and currently exploring the following possibilities:
- Doorbell ring – This is one of the common requests. You want to have a doorbell sound played with the doorbell pressed. The situation is more complex, as the initial device status might be different each time and for each zone. Usually, you might want to play a doorbell sound at certain level (based on daytime), but if there is a music playing already, it would be great to pause that playback, set proper volume, play the doorbell sound, return to the previous volume and resume the playback.
- Alarm – Similar story to the previous, with the difference of the volume not being low or off during the night, and also a playback resume (if any) is also not probably expected. There might be different sound files played for each event (burglar alert, smoke alarm, water leakage, …).
- Audible notifications - This might sound similar to the previous item, but here I was thinking more about Text-To-Speech. Ideal scenario for these notifications is to be mixed over the music played, which would fade out a bit into background for the duration of the notification. However, I do not see this realistic with the current LMS options. It is just an item on the list for the future.
If you have any suggestions or comments, feel free to use this forum.
What could we do better?


Hello Kops,
First of all congratulations on an impressive and comprehensive guide and thank you for the kind words on our Max2Play! 🙂
I really enjoyed reading it and seeing how our software comes in handy for other home automation systems. We actually put together a specific plugin called API Examples (free and preinstalled on all new image downloads) that auto-generates a list of the most common HTTP commands (Squeeze, Jivelite, Max2Play, Kodi) as well as some pointers and further infos for CLI.
If you don’t mind, I’d like to share this article with our community.
Kind regards
Heiner from Max2Play
Hi Heiner, thanks a lot for your comment.
You and your team fully deserves the attention, the Max2Play image is really awesome. Everything I was looking after was already somehow implemented there. And regarding the API plugin, yes I am aware of it and using that for some of the functions. But still, some scenarios will need to be explored in more detail from my side.
Anyway thanks, feel free to share and keep up the good work.
Hi, nice to see that LMS is still used till today to build a multiroom setup. I’m using it now for almost 3 years, and have to say that is works very stabil.
I don’t know about max2play, because I worked with adapting raw LMS and Squeezelite scripts myself. But I got a working doorbell system build by installing 2 Squeezelite instances on 1 raspberry pi. One instance plays music, the other plays the doorbell/notification sounds. I just pause the music player during the doorbell sound and resume after.
I created in the past a php script which could detect the lenght/time of an mp3 file. Since my doorbell sound is an mp3, it automaticly pauses the music Squeezelite player for the correct amount of time.
Hi Kurt, that sounds interesting. Did these two instances use the same HW audio output?
I spent a lot of time to find something similar to this
Hi Kops,
What an excellent and beautiful Loxone site you’ve made here! I was looking for something like this. Excellent tutorials too. I’ll make sure and try the HiFiBerry with Loxone and also that water level sensor.
Thanks so much for all the effort you’ve put into this, and keep up the good work! Keep the community alive! (even of Loxone doesn’t really want you to 😉 )
Cheers!
Bart
Hi Bart, I really appreciate your time to write this comment here and I am very happy you find this site useful.
you forgot this https://music-server.net/help/Willkommen.html
Also using MusicServer4Home in combination with Loxone, with 9 zones (2x USB 7.1 soundcards) + Dayton 12ch amplifier. Very happy with it for +1,5 year.
Dear Q!
Could you share me your multiroom audio system parts (with exact hardware components) and schema? I am a complete layman when it comes to audio.
Thank you in advance,
Daniel