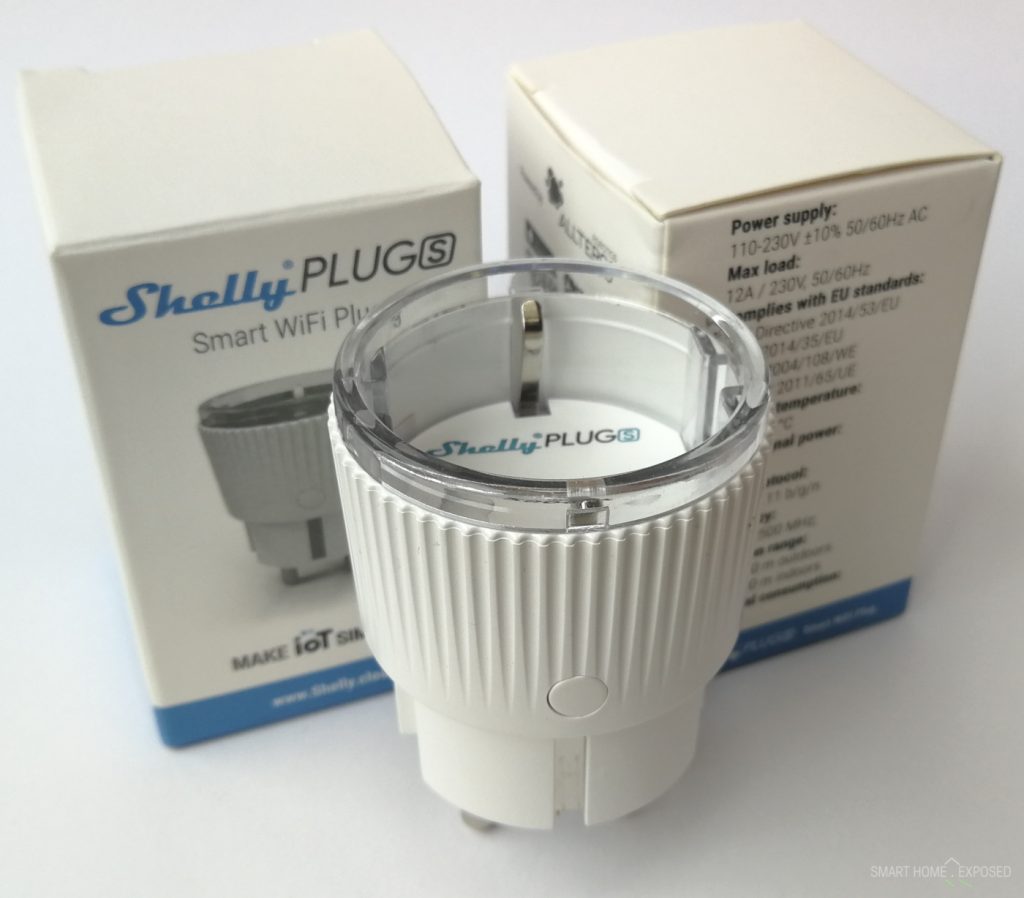
Shelly Plug S is a neat and tiny WiFi Plug that is very feature rich and has been designed by clever developers. I am really impressed about the overall design and SW capabilities this “smart” device offers. Unlike other “smart products” that forces you into vendor specific ecosystem (App, Cloud, ..), with Shelly the real freedom comes true! It has well documented API letting you to implement these devices into almost any home automation system including Loxone.
Typical use case scenario
If you want to control an appliance or have a wall socket that you have not separately wired from a relay output and now you want to be able to turn it ON/OFF remotely, Shelly Plug S is the perfect fit here. Moreover, it can measure the actual power consumption (W) and can be manually triggered ON and OFF by a simple button press on its body.
To be able to communicate with this socket, WiFi 2.4 GHz (b/g/n) network is required. Shelly has an embedded Web server and can work in AP mode as a fully standalone device. It does offer mobile web app for a quick use and configuration purposes, and also mobile apps for iOS and Android (which I have not tested). The socket is designed for max load up to ~10A at 230VAC and indoor use (IP20).
The embedded system offers some interesting built-in functionality, such as scheduled ON/OFF based on a weekly calendar or sunrise/sunset event, and timer when to turn the socket ON or OFF. It has also some advanced features like configurable max power protection (1W – 2500W) or actions that can call specific URL on various event types like “button pressed”, “output switched on” and “output switched off”. Together with Cloud service this socket can be controlled remotely. I am not reviewing these features, but I admit it might be useful for wide range of scenarios out of the box.
Shelly and Loxone
For Loxone integration the AP mode is needed only for initial setup, after which we switch this Shelly Plug into Client mode. Basically it works the way that the first time you plug it in, it appears as a new WiFi network to which you need to connect to in order to access the settings. From there you switch to Client mode by specifying the SSID and password. After that it will appear as any other device in your wireless network. You only need to make sure that it gets fixed IP address (either through DHCP reservation or in the device setting itself), otherwise the commands used by your automation won’t work after IP update.
There is a detailed documentation of all the commands Shelly supports. BTW, they do have more interesting devices like relays and others, but I haven’t been purchasing these yet.
To understand the way of communication let’s have a look at a few examples here. If you did for any reason mess up the settings, you can roll-back to factory defaults by holding the device button for 10 seconds.
Command line examples
Once you have successfully connected your Shelly into your WiFi network, you can try the following commands from your internet browser. Obviously you need to know the IP_ADDRESS that your router (DHCP server) has assigned to this Shelly Plug.
Try a first command:
http://IP_ADDRESS/shellyResponse:
{"type":"SHPLG-S","mac":"M4CM4CM4CM4CM4C","auth":false,"fw":"20190516-073020/master@ea1b23db","num_outputs":1,"num_meters":1}If you get similar response in your browser window your Plug is connected properly. Next what you can test is to ask for status.
Command to get status of the device:
http://IP_ADDRESS/statusResponse:
{"wifi_sta":{"connected":true,"ssid":"YOUR_SSID","ip":"IP_ADDRESS","rssi":-93},"cloud":{"enabled":false,"connected":false},"mqtt":{"connected":false},"time":"","serial":1,"has_update":false,"mac":"M4CM4CM4CM4CM4C","relays":[{"ison":false,"has_timer":false,"overpower":false}],"meters":[{"power":0.00,"is_valid":true,"timestamp":0,"counters":[0.000, 0.000, 0.000],"total":0}],"temperature":35.71,"overtemperature":false,"update":{"status":"unknown","has_update":false,"new_version":"","old_version":"20190516-073020/master@ea1b23db"},"ram_total":50832,"ram_free":40124,"fs_size":233681,"fs_free":171684,"uptime":1003}
Both indicators can be turned off in the configuration menu.
OK, lets try to turn the socket ON with the next command:
http://IP_ADDRESS/relay/0?turn=onResponse confirming the socket is ON:
{"ison":true,"has_timer":false,"overpower":false}Command to trigger the relay OFF:
http://IP_ADDRESS/relay/0?turn=offResponse confirming the socket is OFF:
{"ison":false,"has_timer":false,"overpower":false}There is a similar command to just change the state of the relay called TOGGLE:
http://IP_ADDRESS/relay/0?turn=toggleAnd if you for instance want to turn on the socket for just 5 seconds and then let it automatically switch off, here is what you can use:
http://IP_ADDRESS/relay/0?turn=on&timer=5Response now confirms timer function is on:
{"ison":true,"has_timer":true,"overpower":false}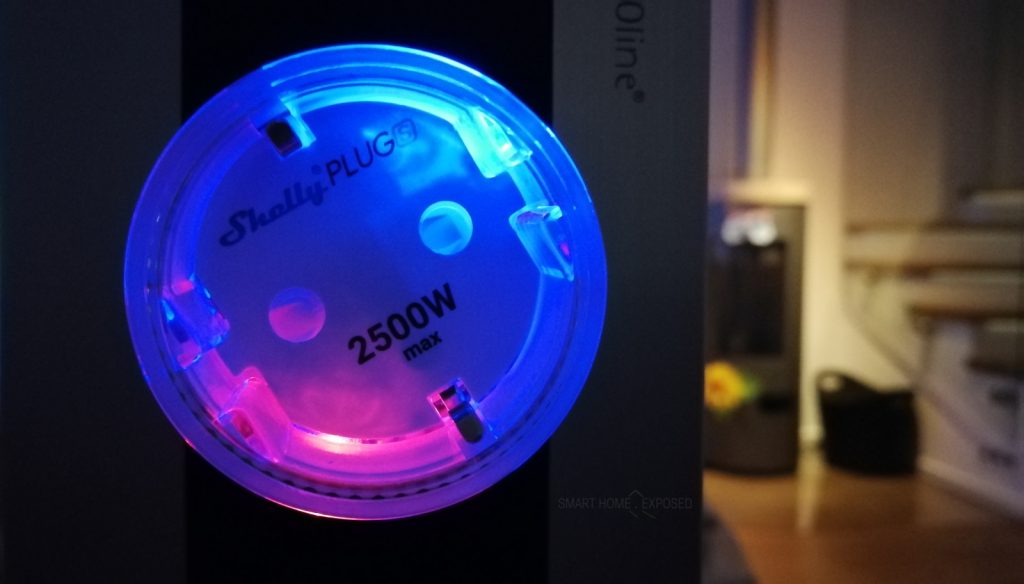
Similar timer command can be used to power off. Now lets see what happens when I connect my wife’s hair dryer in this socket. With this command we can see the current energy consumption in the response.
Command:
http://IP_ADDRESS/status/meter/0Response:
{"wifi_sta":{"connected":true,"ssid":"YOUR_SSID","ip":"IP_ADDRESS","rssi":-84},"cloud":{"enabled":false,"connected":false},"mqtt":{"connected":false},"time":"","serial":1,"has_update":false,"mac":"M4CM4CM4CM4CM4C","relays":[{"ison":true,"has_timer":false,"overpower":false}],"meters":[{"power":1537.44,"is_valid":true,"timestamp":0,"counters":[0.000, 0.000, 0.000],"total":0}],"temperature":36.26,"overtemperature":false,"update":{"status":"unknown","has_update":false,"new_version":"","old_version":"20190516-073020/master@ea1b23db"},"ram_total":50832,"ram_free":38328,"fs_size":233681,"fs_free":171684,"uptime":3714}Here you can see that this hair dryer is taking 1537 Watts. This gets visualized through the embedded web service like this:
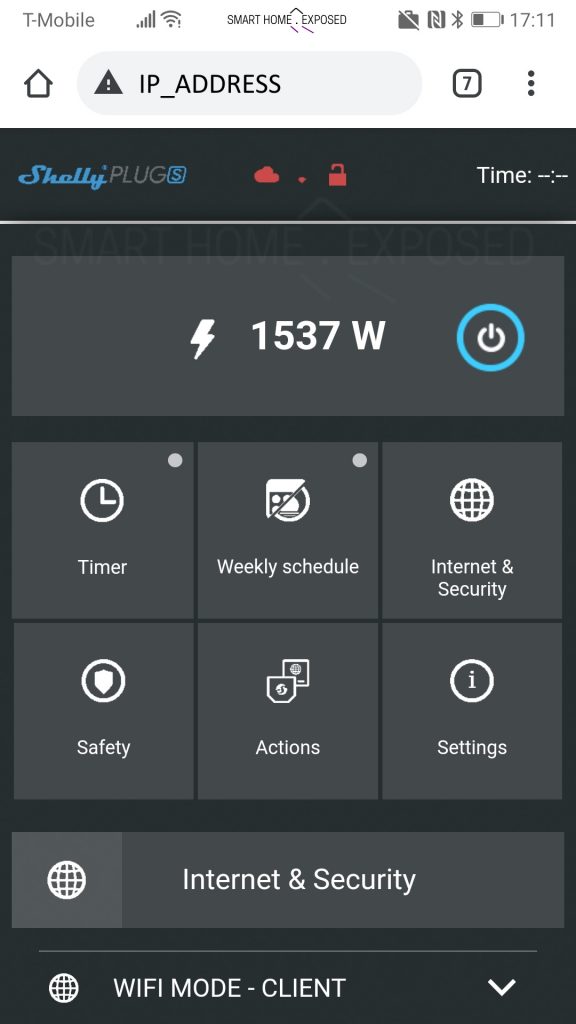
So these were the few basic commands to play with at the beginning. This way it can be called by almost any home system.
How to add into Loxone config
Now adding Shelly Plug into Loxone is quite easy. Basically it can be done by adding Virtual Outputs for ON and OFF and calling the relevant URL we described above. However, there is much more what can bee done to achieve seamless integration. We can also add Virtual Inputs that could read the status from Shelly (incl. temperature of the device, current power consumption) and also let the hardware button call for certain action in Loxone.
Virtual Output
To setup Virtual input and output is quite straight forward procedure, especially if you are familiar with the Loxone Config interface. If not, I fully recommend studying the documentation. If you want to use and import the predefined values, XML files are below to be imported. Or you can just copy the code into an XML, save under some name e.g “Shelly_Plug_S_VO.xml” for virtual output and similarly “Shelly_Plug_S_VI.xml” for virtual input code below.
<?xml version="1.0" encoding="UTF-8"?>

-<VirtualOut CmdSep="" CloseAfterSend="true" CmdInit="" Address="http://IP_ADDRESS" Comment="" Title="Shelly Plug S">

<VirtualOutCmd Comment="" Title="Shelly Plug S" RepeatRate="0" Repeat="0" Analog="false" CmdOffPost="" CmdOffHTTP="" CmdOff="/relay/0?turn=off" CmdOnPost="" CmdOnHTTP="" CmdOn="/relay/0?turn=on" CmdOffMethod="GET" CmdOnMethod="GET"/>

</VirtualOut>
Shelly_Plug_S_VO.xml file download (ZIPped)
This code lets you send a command from Loxone to trigger the relay in Shelly Plug to turn ON or OFF the socket. In the Loxone config this will look the following:
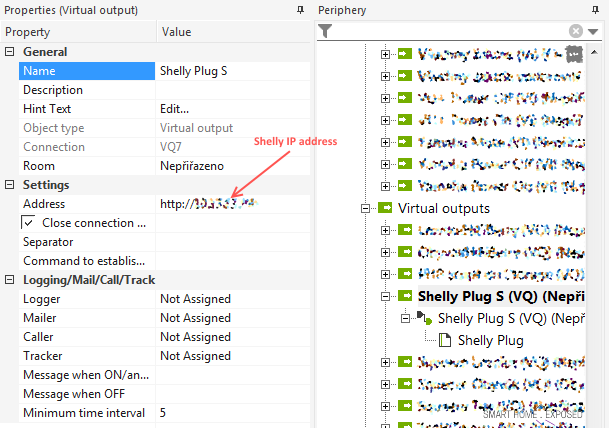

Once you have that configured, you will be able to control Shelly Plug from Loxone directly.
Virtual Input
Now here is what is needed to get the status from Shelly Plug into Loxone. In general, this works the way that Loxone is periodically requesting the complete status from Shelly over HTTP, and then parsing the response into several variables. It is not ideal for sure, but the other way round (Shelly to inform Loxone about changes) I couldn’t make it work. Will explain below.
Again, here is an XML export for Virtual inputs, these can be imported into Loxone Config to save some time. But you can also configure everything manually.
<?xml version="1.0" encoding="utf-8"?>
<VirtualInHttp Title="Shelly Plug" Comment="" Address="http://IP/status/" PollingTime="10">
<VirtualInHttpCmd Title="Shelly Plug S Connected" Comment="" Check="connected":\1" Signed="true" Analog="true" SourceValLow="102" DestValLow="0" SourceValHigh="116" DestValHigh="1" DefVal="0" MinVal="-10000" MaxVal="10000"/>
<VirtualInHttpCmd Title="Current Power" Comment="" Check=""meters":[{"power":\v" Signed="true" Analog="true" SourceValLow="0" DestValLow="0" SourceValHigh="100" DestValHigh="100" DefVal="0" MinVal="-10000" MaxVal="10000"/>
<VirtualInHttpCmd Title="Consumption" Comment="" Check=""total":\v" Signed="true" Analog="true" SourceValLow="0" DestValLow="0" SourceValHigh="100" DestValHigh="100" DefVal="0" MinVal="-10000" MaxVal="10000"/>
<VirtualInHttpCmd Title="Relay ON" Comment="" Check=""ison:true"" Signed="true" Analog="true" SourceValLow="102" DestValLow="0" SourceValHigh="116" DestValHigh="1" DefVal="0" MinVal="-10000" MaxVal="10000"/>
<VirtualInHttpCmd Title="Temperature" Comment="" Check=""temperature":\v" Signed="true" Analog="true" SourceValLow="0" DestValLow="0" SourceValHigh="100" DestValHigh="100" DefVal="0" MinVal="-10000" MaxVal="10000"/>
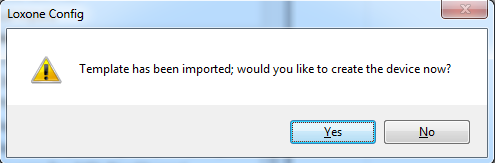
</VirtualInHttp>Shelly_Plug_S_VI.xml file download (ZIPped). To import the XML, you simply do the following steps:

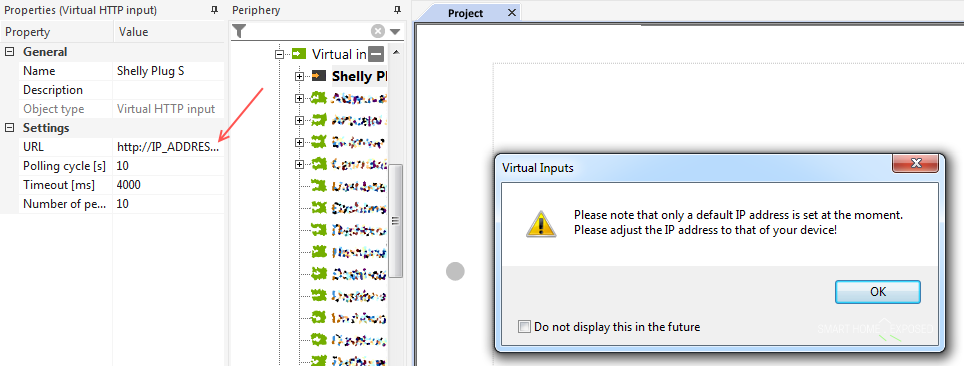
The end result in your Loxone config should contain five variables to work with. Let’s explain a bit more how we are parsing the values and what are the limitations for each.
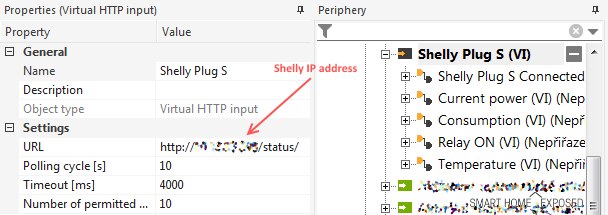
- Shelly Plug S Connected
- This is to indicate that the Plug is successfully connected to your WiFi. Obviously, if it is not, the call for the HTTP request won’t arrive anywhere, but using the error value you can have that equal 0 if no data, else you should get 1 as connected.
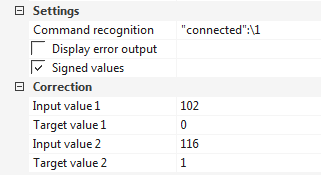
- The command recognition is “connected”:\1
- To have the response formatted as 0 and 1, you need to use the correction property filled as follows: Input 102 equals 0, Input 116 equals 1. This is because we are checking for true or false in a text string based on the first bit. I haven’t found any other way how to get binary value from textual representation true/false.
- Current power
- This visualizes the current power consumption as measured by Shelly. Please note, this number is a live reading and as such cannot be used to accumulate the total consumption of the device that’s plugged. We are refreshing the data in Loxone every 10 seconds. But is a device doesn’t have constant current consumption, you’ll see only snapshots from the moment of the data refresh. To get better sense of the total consumption, see Consumption below.
- Relay ON
- This is to let you know whether the Plug is turned on or off. This is better than to have it visualized directly in Loxone from a Push-Button block, as it can get out of sync when someone touches the plug HW button or the plug is after power outage.
- The command recognition is “ison”:\1
- Again same logic needs to be applied for correction as above, because of the true/false response from Shelly.
- Temperature
- This reads the temperature of the Shelly Plug. It probably somehow correlates with ambient temperature, and probably can be used for some logic.
- The command recognition is “temperature”:\v
- Consumption
- Here is the interesting part. According to the documentation there are the following counters inside Shelly Plug:
counters | array of numbers | Energy counter value for the last 3 round minutes in Watt-minute |
total | number | Total energy consumed by the attached electrical appliance in Watt-minute |
To get the total consumption, we just read the “total”, giving us the value in Watt-minute since the Shelly Plug S was connected to power. We can use this value to get accumulated data on the consumption, multiplied by 0.017 we get to standard Wh power consumption totals. The drawback here is that after any Shelly Plug restart, the value starts again from zero. 🙁

Now if you have these inputs in the config set to be displayed in the visualization, you should be able to see the the actual values with 10 seconds refresh interval.
Actions URLs to inform back to Loxone
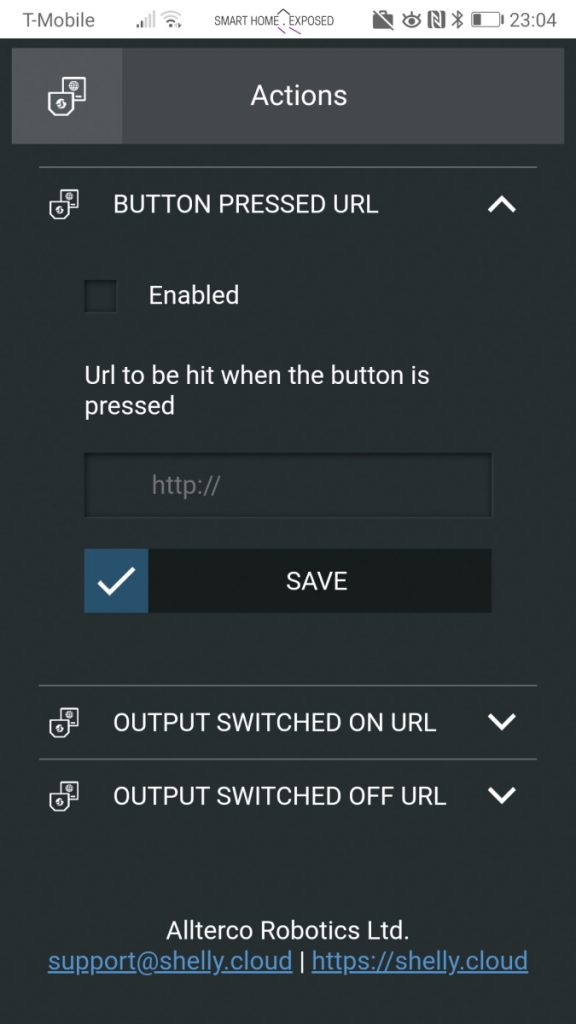
I was expected a lot from this particular feature, however I couldn’t make it work for some reason. If you have been successful, please share the secret 🙂
I thought this would be extremely helpful to notify Loxone about status changes, that happen outside of Loxone, either by the hardware button press on the Shelly Plug, or by the app or web interface. This is to tell Loxone that the output was switched ON or OFF to reflect that in the Loxone visualization.
There are three events we can define in the Shelly Plug S:
- Button Pressed URL, which is what the Shelly will call when someone presses the HW button on the plug
- Output Switched On URL, which is what the Shelly will call when Relay is switched to ON.
- Output Switched Off URL, which is what the Shelly will call when Relay is switched to OFF.
Now the URL to inform Loxone about these events should have the following format:
- Button press URL to be filled in the Shelly’s actions setting
- http://user:password@LoxoneMiniserverIP:Port/dev/sps/io/VI4/pulse
- Relay status ON
- http://user:password@LoxoneMiniserverIP:Port/dev/sps/io/VI4/on
- Relay status OFF
- http://user:password@LoxoneMiniserverIP:Port/dev/sps/io/VI4/off
In case you do not understand the format of the URL used for Loxone Miniserver, please study the following documentation explaining how to address your Loxone virtual inputs using a web commands.
I did setup specific user for this event, configured these URLs triggers, but still had no success in changing the status of the VI4 Loxone’s input. It works from browser window, but not from Shelly’s interface. Maybe this has something to do with the basic authentication, but I don’t know yet. I will update the post once I will be able to notify Loxone from Shelly Plug S on every relay status change or button press.
Energy consumption
Now usually the reasons for controlling (turning ON / OFF) an appliance in the socket is either safety, or electricity savings, unless there is a specific other purpose (triggering pump at certain situation for instance). But what logic it would have in case the “smart” socket itself consumed almost the same amount of energy as the device you want to have in it?
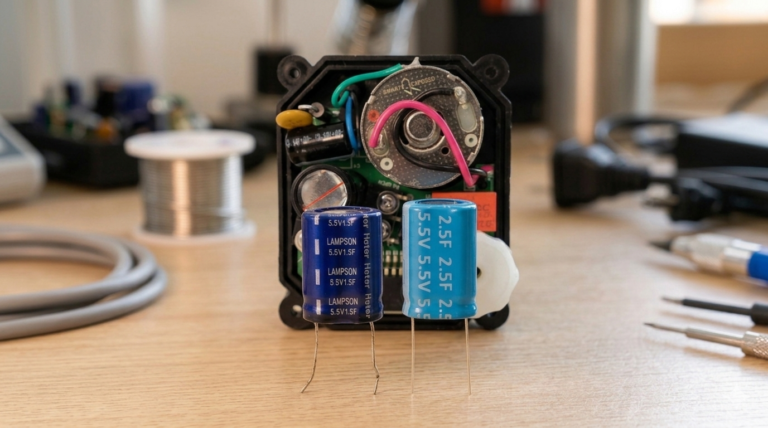
I did a quick measurement to explore this. In my mains socket at home I measured exactly 229.5V AC / 50Hz. The tested Shelly Plug S consumed 3.64 mA in idle, and 5.37 mA when the relay was ON. That gives the energy consumption of 0.835 W in idle (means less than 1 Watt) and 1.232 W when ON. Maybe this could go even a bit lower if the status LED indicators are disabled. I think the end result is good, considering the fact it powers embedded web server, energy metering and WiFi connectivity.
But what does it really mean for the end user? So it really depends on your use case. For example, my Huawei phone charger consumes 0.19 mA at 230V which is around 0.44 Watts in idle when nothing is connected. Using Shelly Plug S to switch it off doesn’t make any sense, because this “smart” plug consumes more energy then my idling phone charger. And yes, safety might be the other reason, but… then it is up to a debate whether leaving unattended charger is safer than Shelly. But this was an intentional corner scenario. In many others this awesome plug makes a lot of sense.
Signal strength and operation range
Shelly claims to have 1 mW radio signal power. Mobile phones and tablets do typically max at 15 mW (12dBm), while access points max at 100mW (20dBm) on 2.4 GHz [*]. Obviously, given the signal power and small form factor there is known limitation in the operation range.

The manual says it is up to 50 m outdoors and up to 30 meters indoors. In my case it worked fine through one concrete wall, but was out of range once I moved it on the upper floor, even though the mobile and laptop has not any problem there. This is I think the only limitation to consider before purchase, depending on your WiFi network setup and coverage. You need to have good signal coverage on the place you want to have this Plug.
Closing statement
I am very surprised by the Shelly Plug S. Interestingly high value and a lot of features put into such a small plug. Even as a standalone product it has a lot to offer as a network plug, to switch-ON stuff on a sunset and switch-OFF at sunrise or based on a given schedule. Also, it works well as a remotely controlled socket with live consumption measurement and built-in web server. I appreciate the documentation to the API, which is something other manufactures could learn from. Taking just one example, none of the “smart” consumer lawn mowers I have seen so far have such API available.
There are similar products like this on the market of course, some of these do have a bit different approach. NodOn is one of these using the EnOcean standard. Loxone has their smart socket using their proprietary Air protocol. I have not tested these so it is hard for me to compare. But Shelly is definitely a versatile device, not tied to one isolated system. That’s what is making this device very interesting and widely applicable.
What could we do better?


Hi Kops,
thanks for the great review and detailed instructions how to integrate Shelly into Loxone.
You mentioned some troubles with “Actions URLs to inform back to Loxone”. Here is my solution which works.
Shelly must be set this way:
http://admin:admin_password@192.168.15.253:777/dev/sps/io/shelly_relay/on
“shelly_relay” is the name of Virtual output in Loxone
Shelly firmware: 1.8.3
Loxone firmware: 11.1.9.3
Petr
Hello Petr,
Did he answer you?
Is working properly your intregrantion and this document integration?
If Peter says its working, then it is working. Good job, thanks!
Hello Juanvi,
yes, integration works correctly.
But there was small mistake in my description. I wrote “shelly_relay” is the name of Virtual output in Loxone.
“shelly relay” is virtual input.
Petr
Hi
Thanks for sharing this detailed information AND the XML-templates.
What do you mean with “We can use this value to get accumulated data on the consumption, multiplied by 0.017 we get to standard Wh power consumption totals.”? Is the data wrong? Why do you multiply?
Do you have an example on how to see total energy consumption with time/date in Loxone?
Sven
This is just standard conversion from Watt-minute to Watt-hour. https://www.google.com/search?q=Watt+minute+to+Watt+hour&oq=Watt+minute+to+Watt+hour&aqs=chrome..69i57j6.7960j0j7&sourceid=chrome&ie=UTF-8
Time/date consumption visualization in Loxone would require more investigation. Yes, the easiest would be to use the current consumption available in “Current power” and use that as input P in the Utility meter block. However, that would be not very accurate, as explained in the post. Much better would be to use the variable Total consumption, however that is not so easy to pass to the utility meter block. As I am not using it this way, I do not have the config setup handy. But maybe somebody here will.
Hi folks,
thanks for great tutorial. I have been succesfull until adding virtual outputs. But I have still a problem, with the inputs from shelly. Can anyone send me VI xml please? (the one provided here didn’t get imported) I use the plug for water heater. The taks, which is in front of my is to read my waste water tank. I have already purchased water level sensor and Shelly UNI which reads fine the 0-10V range in my “lab”. The next step is to get it to read to Loxone, so my water pump will work when needed powered from Loxone Multi Ext Air.
Best Regards to All of you.
Ivo
Thanks for this
I have the door / window sensor
I dropped the port number from the command and changed the on and off for 1 and 0 on open and close commands. works well.
VI1 is the name of the virtual input. as long as they match it works
http://user:password@192.168.1.195/dev/sps/io/VI1/1
Any reason why you didn’t opt to use the UDP messages from the Shelly Plug S in Loxone?
Seems to react faster then the polling of the status message…
More information on: https://loxwiki.atlassian.net/wiki/spaces/LOX/pages/1605271966/Shelly+per+UDP+Gen.1
Hey, can you please share some basic step by step or at least some screenshot to be able to implement the meter for shelly plug? Thanks
Any solution for the API control for On and Off for Shelly Plug S v1 ?
Thank you inadvance!